Screen + Camera or screen only? Choosing a recording mode
How Showesome’s three recording modes work — screen + camera, screen only, and camera only — and when to use each for tutorials, demos, and face-to-camera clips.
Different recordings need different levels of presence. Sometimes viewers only need the screen; sometimes your camera adds context; and sometimes the message is just you talking directly to the audience.
Showesome gives you three recording modes to match each situation. Pick the one that fits what your audience needs to see — you can change it anytime from the extension popup.
Where to choose a mode
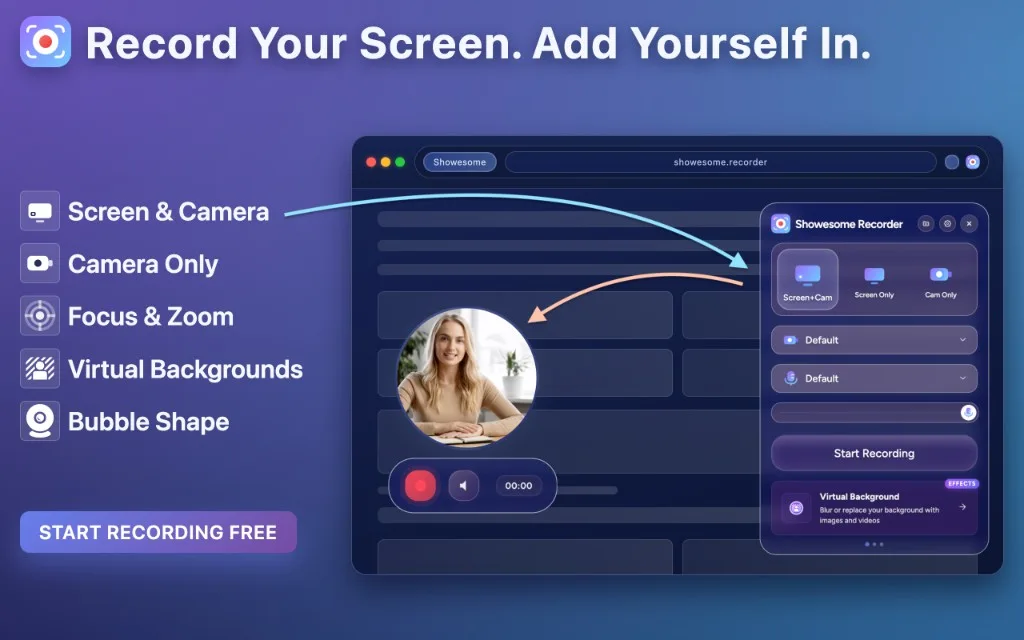
Open the Showesome popup from the Chrome toolbar. The three mode buttons at the top are your recording setup: Screen + Camera, Screen Only, and Camera Only. You’ll also see these options in the Getting Started guide.
Open on watch page (for search and full-screen viewing)
Screen + Camera
Best for tutorials, demos, and presentations where viewers should see your screen and your face at the same time.
Seeing the presenter’s face can make tutorials feel more engaging and easier to follow. Your screen is captured in full, and your camera appears as a bubble you can drag anywhere so it does not cover important UI. This is the default mode for many creators because it feels personal without hiding the product. For a full Chrome walkthrough, see How to record screen + webcam in Chrome. You can also use virtual backgrounds on the bubble feed when you want blur or a gallery backdrop.
Reach for this when: you are explaining software, walking through a workflow, or presenting slides and want a human presence on camera.
Screen Only
Best for demos and walkthroughs when the screen alone should carry the story.
No camera bubble — just a clean capture of your display (full screen, window, or tab, depending on what you pick in Chrome’s share dialog). Great when you prefer not to be on camera or when a face cam would distract from dense UI.
Reach for this when: the content is the interface, code, or slides, and you do not need a picture-in-picture presenter. This is also the default choice for bug report screen recordings.
Camera Only
Best for video messages, quick updates, and face-to-camera content.
Your webcam fills the frame. In the popup you can choose how camera-only behaves: a bubble on top of the page (so you still see the site behind you) or a full-screen camera view when you want a traditional talking-head recording. This mode is also the most natural fit for virtual backgrounds — blur or a gallery backdrop with live preview before you record.
Reach for this when: you are recording yourself without sharing the screen, or you want a lightweight clip without opening the screen picker.
You can switch anytime
Nothing is locked in at install. Change mode in the popup before you hit record, or stop, switch, and start again. If you are unsure, start with Screen + Camera for tutorials — then try Screen Only or Camera Only on your next clip.
What are the three Showesome recording modes?
Screen + Camera, Screen Only, and Camera Only. Pick in the popup before you start — each fits different tutorial and update workflows.
When should I use Screen + Camera vs Screen Only?
Screen + Camera for walkthroughs where your face adds trust or context. Screen Only for UI-only demos, bug repros, and slide-heavy captures without a bubble.
Can I switch recording modes between takes?
Yes — change mode in the popup before each new recording. You cannot switch mid-recording; stop, pick a new mode, and start again.
Related reading
- Recording tutorials? Focus Mode tips explains how to spotlight what matters on screen while you present.
- Support — FAQs and troubleshooting for recording modes, audio, and permissions.
Was this guide helpful?
One vote per browser. No account required.
Be the first to share feedback.
Comments
Join the discussion — comments are moderated to keep things helpful. Be respectful and constructive.
Preparing sign-in…